How to manually create an Outlook mail profile for Office 365
If we are using Office 365 and needs to configure a desktop Outlook manually, then below are the steps:
Manually create new Outlook profile:
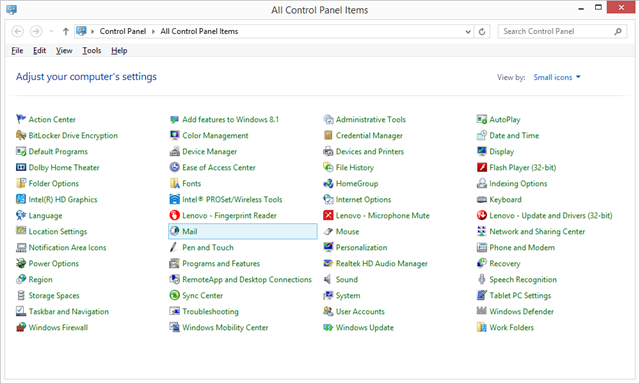
- Open the Start Menu and click “Control Panel”.
- Click Mail.

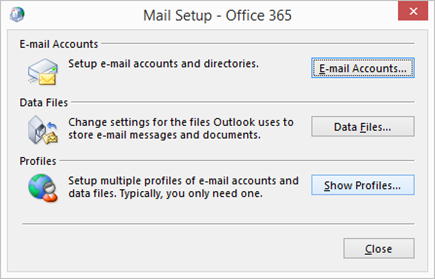
3. Click “Emails Accounts”

4. Select and Remove Old account (if any)
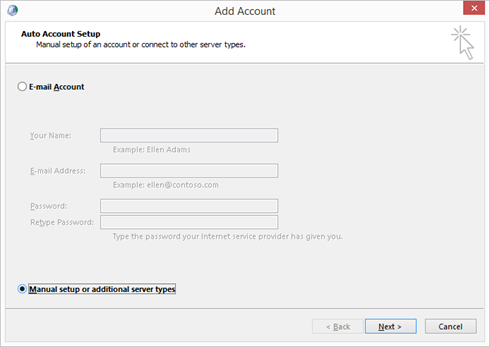
5. Click New
6. Click “Manual setup or additional server type” and click “Next

7. Click “Microsoft Exchange Server or Compatible Service” and click “Next”.

8. In the “Server” box, type “outlook.office365.com”.
9. Enter the email address in the field “User Name”.
10. Click “More Settings”.

- If prompted with an error that the action cannot be completed, click OK.
- Click on the “Security” tab. Configure Security settings switching the logon network security to “Anonymous Authentication”. Uncheck “Encrypt data between Microsoft Outlook and Microsoft Exchange”

13. Click on the “Connection” tab.
14. Select “Connect to Microsoft Exchange using HTTP”.
15. Click “Exchange Proxy Settings.”

16. Enter the proxy URL: outlook.office365.com.
17. Make sure to only connect to proxy servers that have this principal name in their certificate check box is selected, and then type msstd:outlook.com
18. Click to select the on fast networks, connect using HTTP first, then connect using TCP/IP check box, and select the on slow networks, connect using HTTP first, then connect using TCP/IPcheck box.
19. In the “Proxy authentication settings”, click “Basic Authentication”.

20. Click “OK” twice.
21. Click “Check Names”. Provide the office 365 credentials and click save.
22. After the server name and user name are displayed with an underline, click “Next”.
23. Click “Finish”.
24. Click “OK”.
Finally, restart Outlook to begin sending and receiving email from Office 365.
- Why should you automate Active Directory cleanup? - 17 June 2025
- Troubleshooting: Unable to Add Instance Failover Group to Azure SQL Managed Instance - 4 March 2025
- 10 Azure Virtual Desktop (AVD) Cost-Optimization Strategies for 2025 💡💰 - 22 February 2025
