Why do we need to Configure High Availability on DHCP Server Role?
We always need a Failover or Load Balancer for our Network continuity (High Availability). Today I am going to discuss DHCP failover or Load Balance Scenario which will help us to give redundancy over DHCP failure.
Before we start configuring High Availability on DHCP Server Role in Windows Server 2016, just recap the memories from the past that how Microsoft DHCP server has improved over the versions.
- Windows Server 2000/2003– DHCP Failover cluster was possible through Windows cluster, this legacy configuration wasn’t the best thing as it had loads of configuration hurdles but still, it was the only option to achieve it.
- Windows 2008/2012– The DHCP Failover feature allows the High Availability of the service without using cluster services. But one has to have a NAP (network access protection) policy in place. It replicates all the configuration to the partner server.
- Windows Server 2016- The DHCP failover feature doesn’t require NAP from Windows 2016 onwards which makes it quite easy to configure failover or load balance. We are going to discuss the same today.
Installation of DHCP Server
In this scenario, two DHCP servers are created (in real scenario it can be different sites) that will be configured on Load Balance mode (50%-50% share) and we are going to test with two client machines that get the IP addresses from these DHCP Servers.
Here it starts:
DHCP Server -1 (MS Windows Server 2016)
- Open Server Manager
- Click on Add Roles and features
- In the Before you Begin, a welcome page will be displayed. Click on Next.
- In the Select Installation Type, leave the default setting, which is Role-based or feature-based installation, and click Next
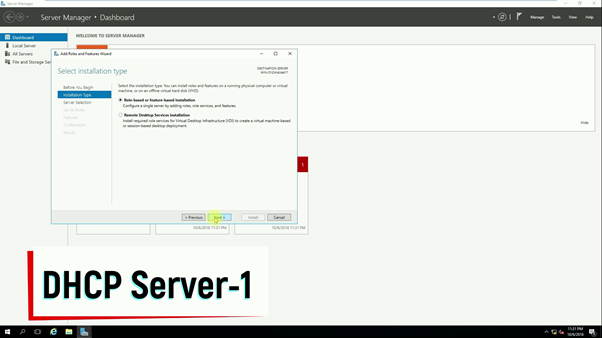
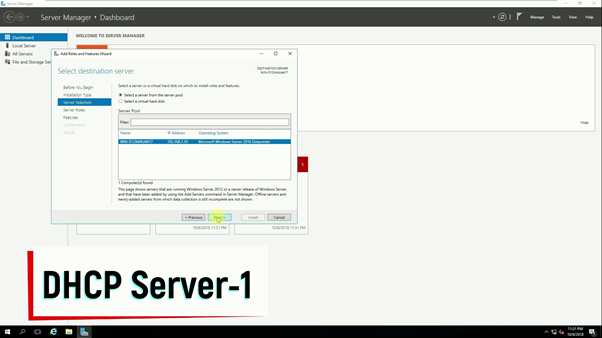
- In the Select destination server, the local server should be listed, and click Next.
- In the Server Roles, select DHCP Server. A new dialog box will be displayed. Click on Add Features
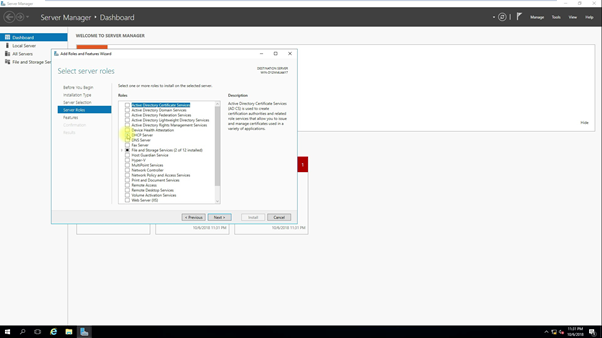
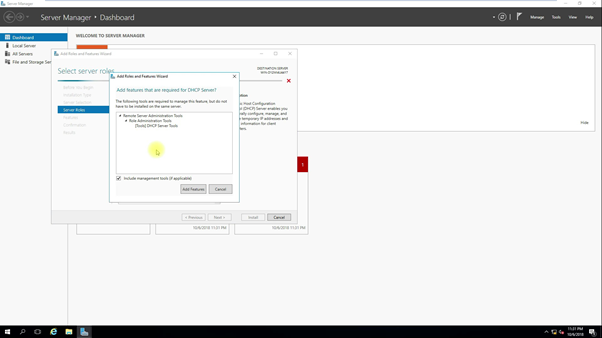
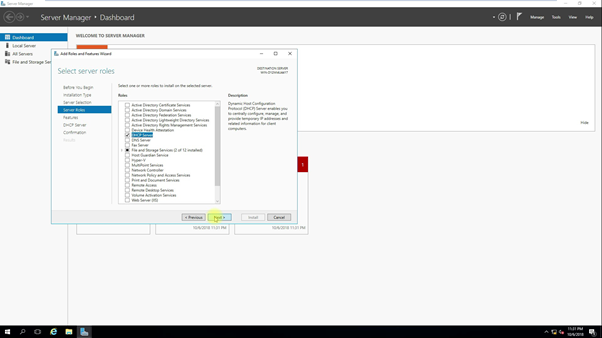
- Back to the wizard, just click Next
- In the Features, click Next.
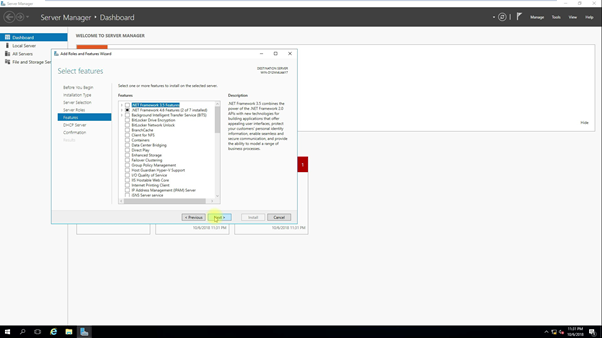
- Click another Next in DHCP Server
- Click Install on confirmation
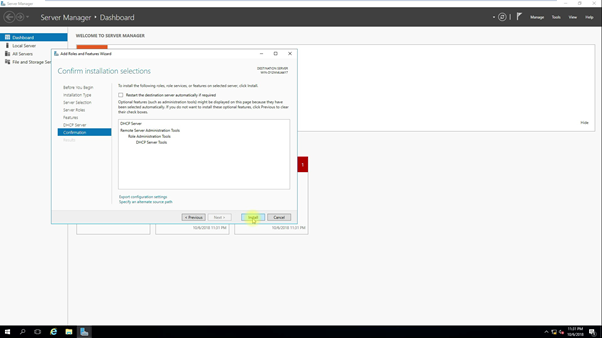
- Wait for the installation to be completed
- Repeat the same steps on another DHCP server
- Once completed, a new message will pop up in the notification of the Server manager to complete the DHCP Configuration. Click on the Link.
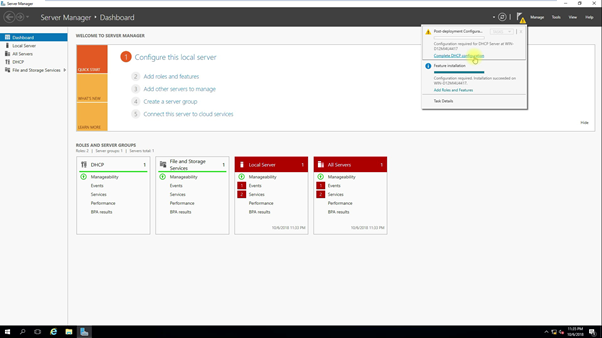
- DHCP Post-install configuration wizard will be launched which basically creates the Security Groups of DHCP to delegate DHCP admin rights. Click on Commit
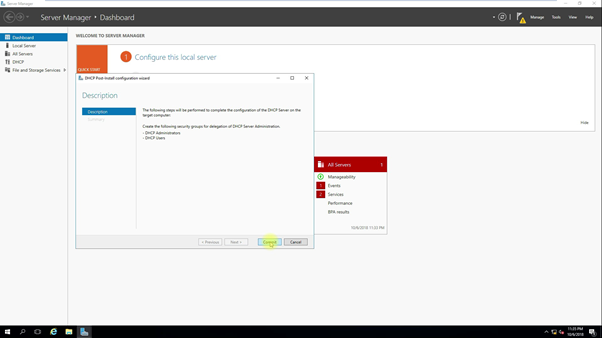
- Once completed. Click Close
Once the DHCP Role gets installed on both servers. The next step is to create a new DHCP Scope on DHCP Server-1 only (don’t create it on another DHCP server)
- Open a DHCP manager, by msc command or open it from Administrative Tools
- Select IPV4 right-click and select New Scope
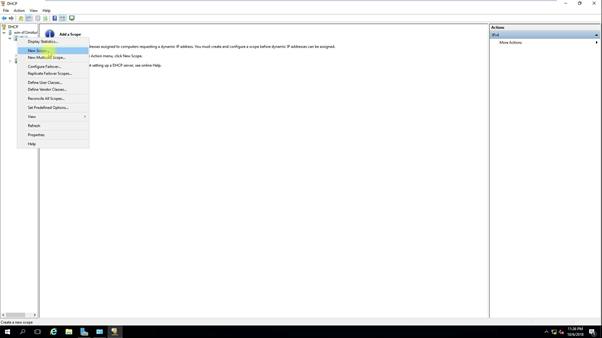
- A New Scope wizard will be launched, click Next
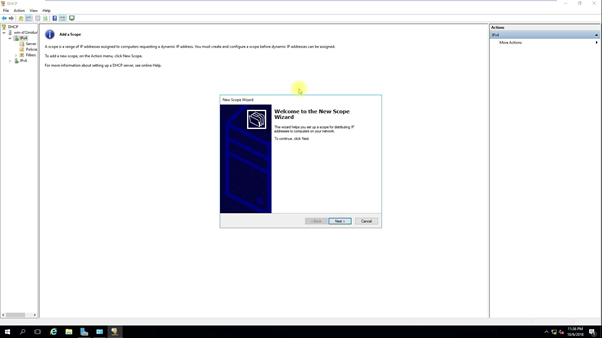
- Provide a desired name, click Next
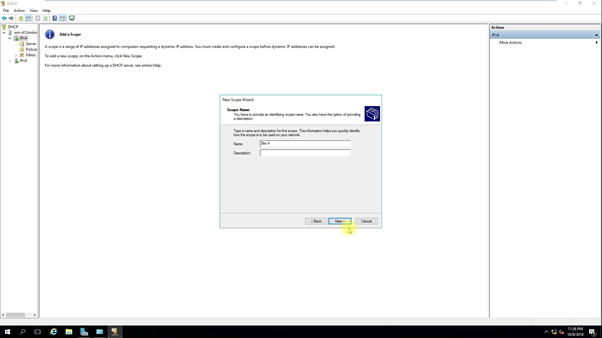
- Enter the desired DHCP IP range and subnet mask, Click Next
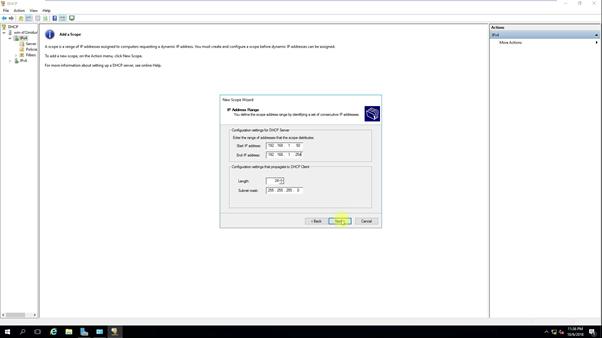
- Ideally, click Next on the other 2 options (as default) that have IP exclusion and IP Lease duration
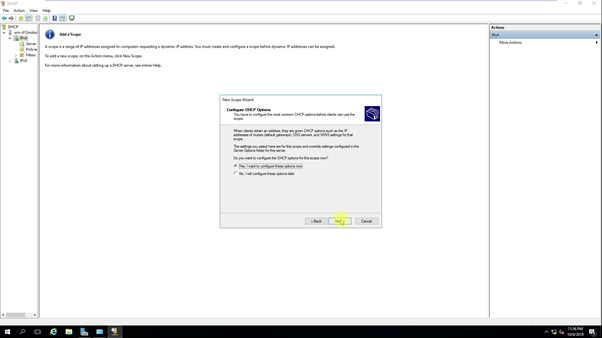
- Click Next on Yes, I want to configure these options now.
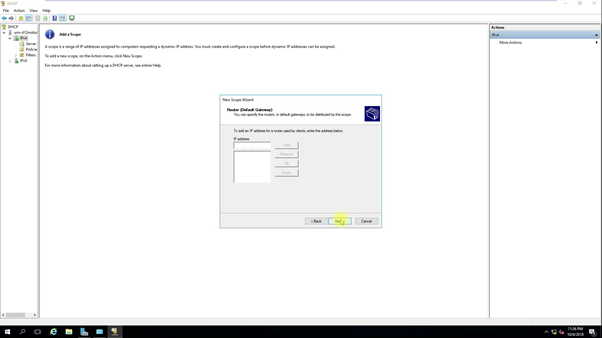
- Add Default Gateway IP address in Router, click Next
- Add DNS servers and domain name, and click next
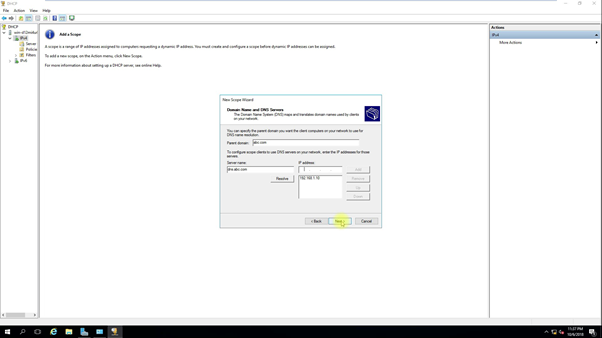
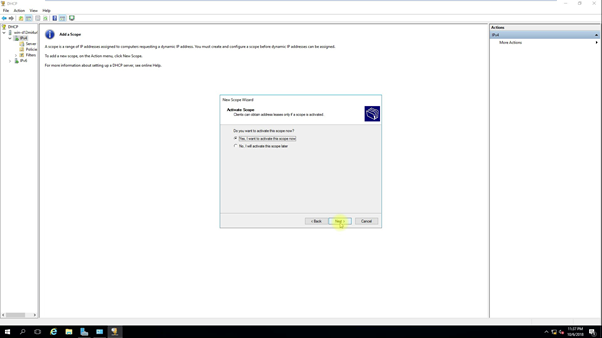
- Select Yes, I want to activate the scope now option and click Next and finish the wizard.
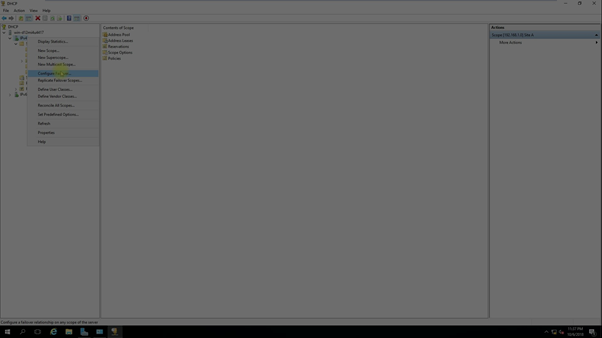
Now, the next step is the main for this blog which is to create a Failover/HA DHCP.
- Go to the same DHCP Console and right click on IPV4 and select Configure Failover.
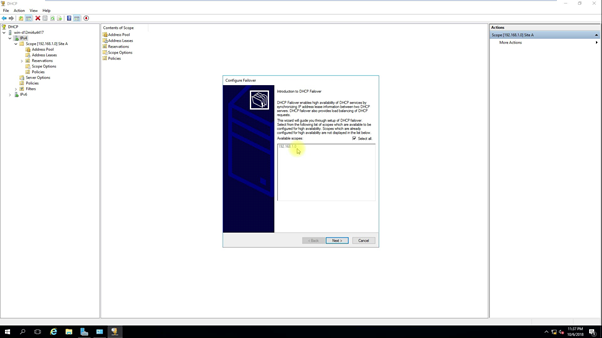
- A new wizard will be opened. Please check for available Scopes if you have more than one and you don’t want it to be included in failover then you may deselect the same. By default, all are selected. Click Next
- Add Partner DHCP Server (second DHCP Server), Click Add Server, and enter the IP address of the other DHCP server (it can also show up authorized DHCP server in AD)
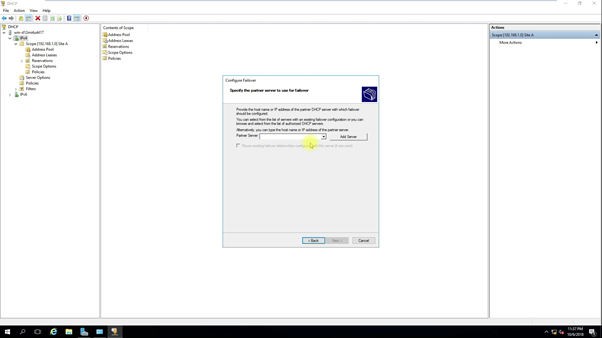
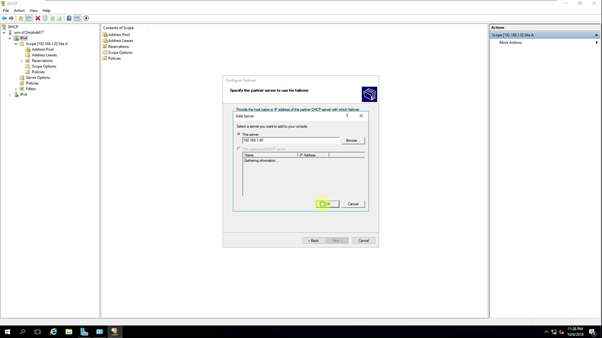
- Click OK and Next
- Next is the Failover Relationship Screen, enter or change the Relationship Name, Check State Switchover Interval and uncheck Enable Message Authentication then click Next
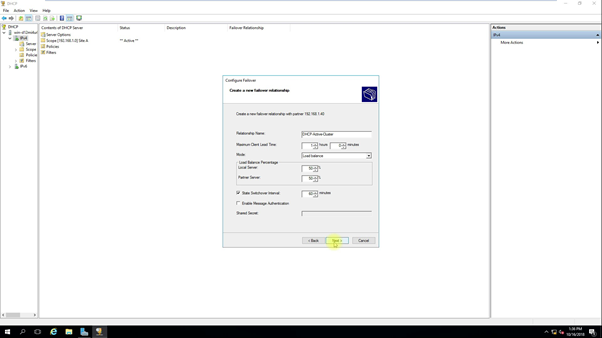
- Click Next and Click Finish
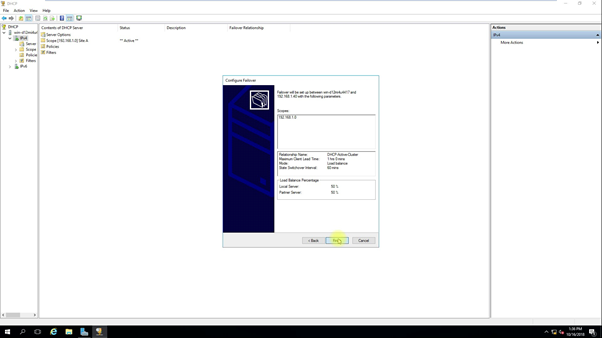
- Configure Failover Progress will be in a pop-up window. Usually, it takes seconds to complete (depending on Network)
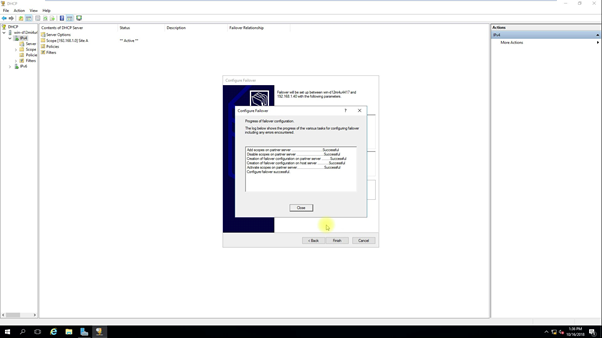
Now you have successfully configured DHCP failover/ HA in Load Balance Mode. This means whatever DHCP is assigned will be shown on both servers and will be assigned on a 50-50 ratio.
Please Note:- There is no Virtual IP being configured over the network for DHCP (which is the best part) so if you using DHCP beyond the router then IP helper will have 2 DHCP IPs to provide the failover or load balance and if it is local LAN then there will be no conflict of DHCP both server will assign IPs and in case one is down then other will automatically work without any intervention or failover (o downtime)
Since we have configured DHCP failover it is time to check that DHCP Scope is replicated to other servers and both are active.
Configure High Availability on DHCP Server is done
DHCP Server 1
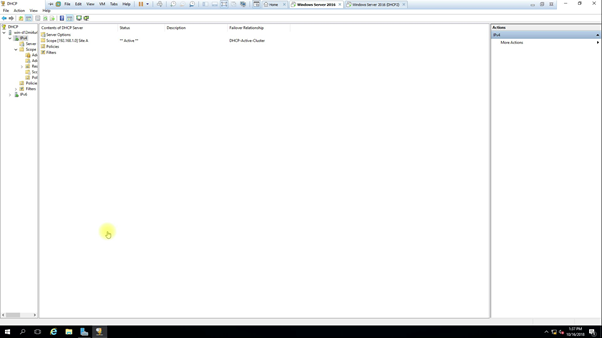
DHCP Server 2
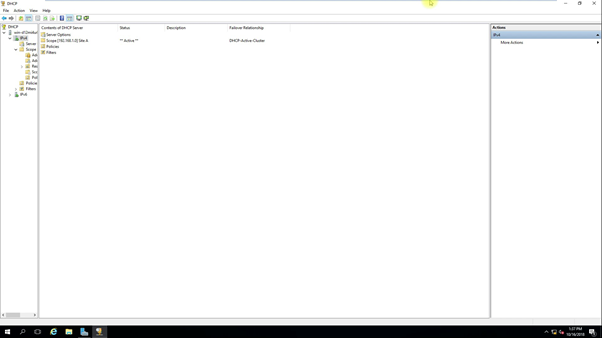
The scope is replicated and Active on both servers. Now let’s check if both of these servers are assigning IP Addresses as per desired configuration.
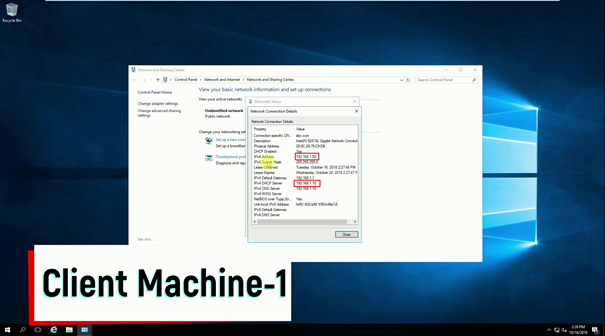
Client Machine 1
Client Machine-2
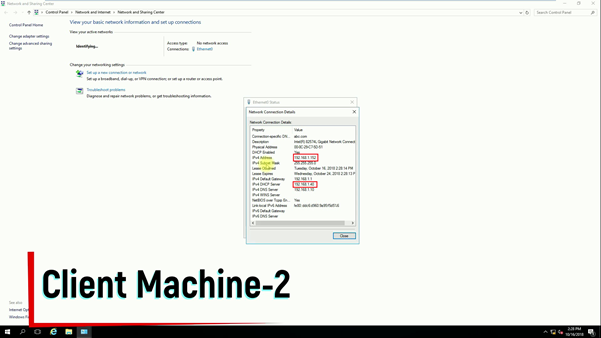
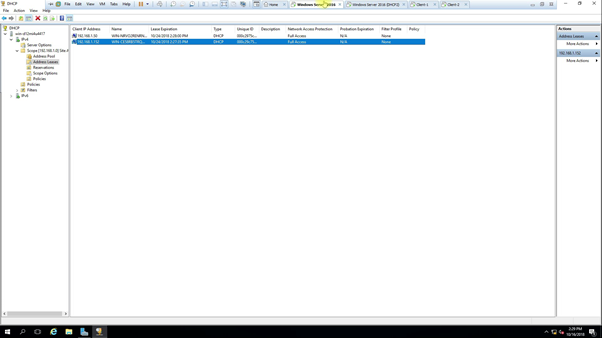
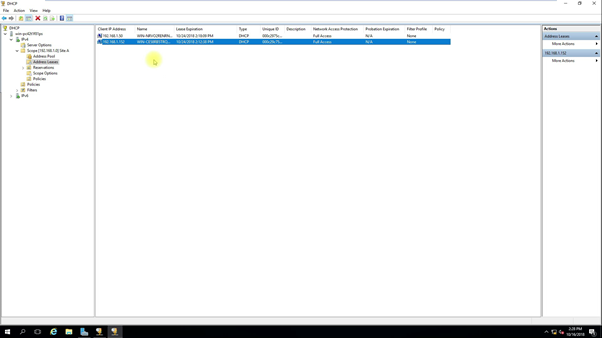
Both machines got IPs from different DHCP servers as Highlighted above. Checking if both of this IPs assignment are populated in both DHCP Servers
DHCP Server 1
DHCP Server 2
Conclusion
Both servers are in sync and working as per expectation. That’s it to configure High Availability on the DHCP Server Role in Windows Server 2016/2019/2022.
You may also watch these steps and other blog videos on my Video channel https://goo.gl/TFicWW. Please subscribe to get the latest videos.
Also Read: How to Secure Active Directory: Best Practices and Pro Tips
Essential Network Ports for Active Directory, DNS, DHCP, and ADFS
Video Tutorial
Configure High Availability on DHCP Server
Configure High Availability on DHCP Server
- Why should you automate Active Directory cleanup? - 17 June 2025
- Troubleshooting: Unable to Add Instance Failover Group to Azure SQL Managed Instance - 4 March 2025
- 10 Azure Virtual Desktop (AVD) Cost-Optimization Strategies for 2025 💡💰 - 22 February 2025


